LEARNING PHOTOSHOP
Lesson 1: OPENING PHOTOSHOP AND CREATING A PROJECT
ASSIGNMENT:
Create 4 Photoshop files:
1) Name: Your Name_Web_size
Width: 1920 pixels
Height: 1080 pixels
Resolution: 300 pixels per inch
2) Name: Your Name_Letter_Print
Width: 8.5 Inches
Height: 11 inches
Resolution: 300 pixels
3) Name: Your Name_Background Color
Any size
Set Contents to Background Color
4) Name: Your Name_Transparent
Any Size
Set Contents to Transparent
SAVE ALL OF THEM IN YOUR GOOGLE DRIVE FOLDER
SHOW MR. BOBERG FOR CREDIT
Lesson 2: IMPORTING PICTURES
Lesson 2A: .png PICTURES
ASSIGNMENT:
1. Bring in 3 large photos
- 1 background
- 2 pictures of any character you want.
- Make sure they are .png photos
- Bring them in and place them in your setting
- Show to Mr. Boberg for credit
1. Bring in 3 large photos
- 1 background
- 2 pictures of any character you want.
- Make sure they are .png photos
- Bring them in and place them in your setting
- Show to Mr. Boberg for credit
Save to your Google Drive folder
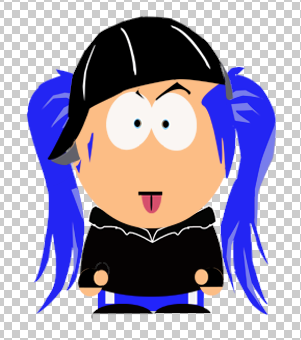
Lesson 3: INTRO TO MOVE TOOL AND LAYERS
|
ASSIGNMENT: Use the move tool to select each item. Put the layers in the correct order so you will see the entire South Park character.
SHOW TO MR. BOBERG FOR CREDIT |
|
| CLICK HERE TO DOWNLOAD MOVE TOOL AND LAYERS LESSON FILE |
Save to your Google Drive folder
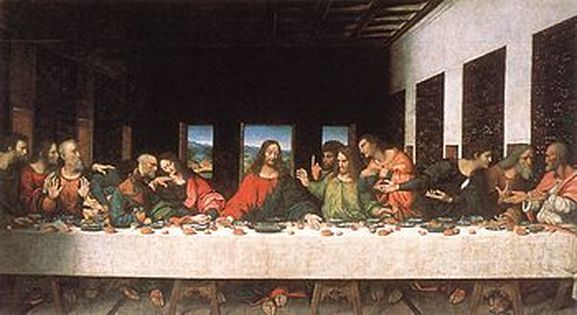
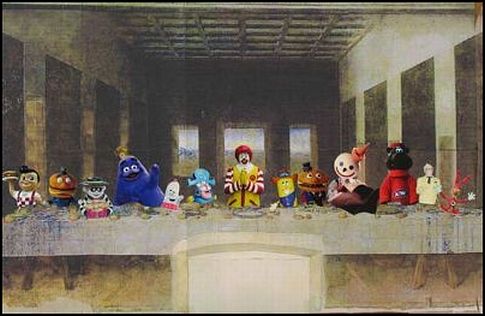
Project 1: The Last Supper Project
Use the tools you have learned so far to create your own Last Supper picture.
1. Click the file to download the file below
2. Find 13 cartoon characters and place them in the picture.
3. They should be layered in a way that makes sense
| last_supper_project.psd |
ORIGINAL:
EXAMPLES:
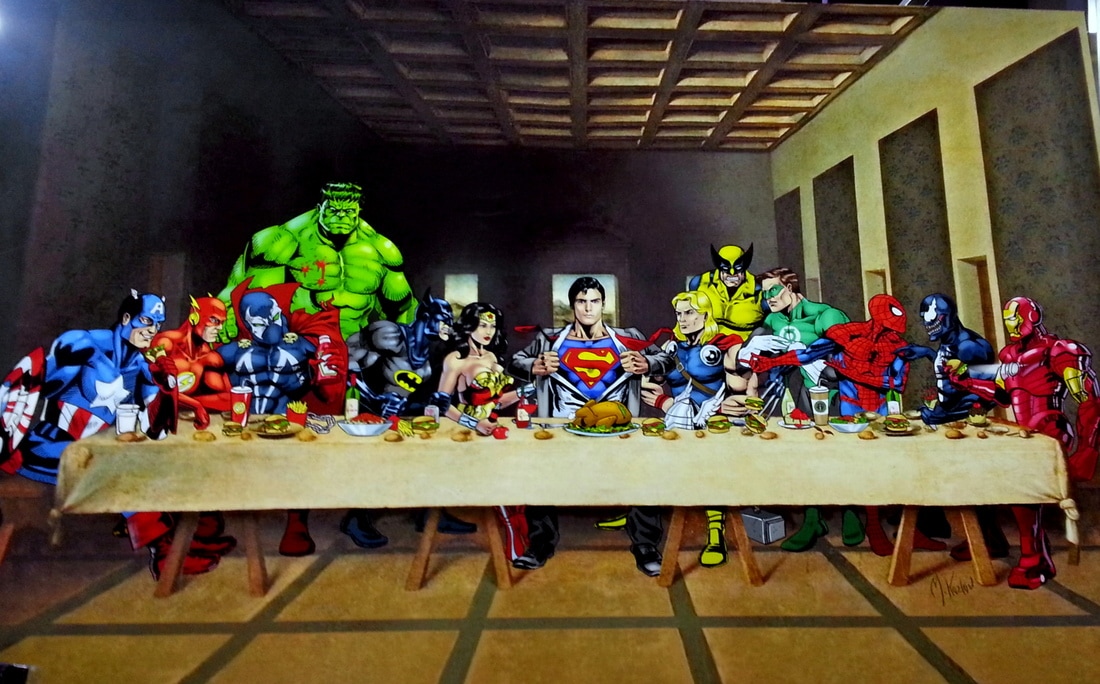
|
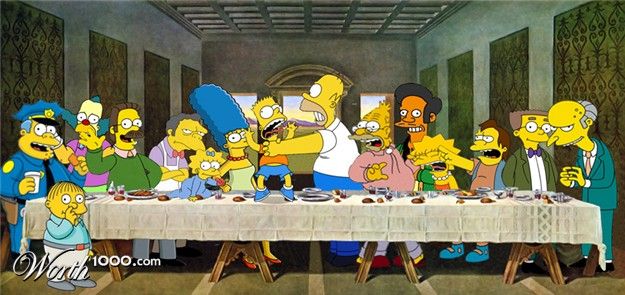
|
|
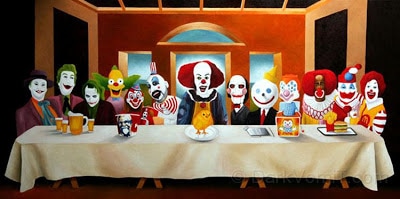
|
RUBRIC:
Lesson 4: BLENDING MODES
| CLICK HERE TO DOWNLOAD BLENDING MODE LESSON PROJECT.psd |
Assignment:
- Find a photo of a musician (MUST BE SCHOOL APPROPRIATE!)
- Use two textures
- Blend them in a cool way
- Do this two times using a different music artist
- Find a photo of a musician (MUST BE SCHOOL APPROPRIATE!)
- Use two textures
- Blend them in a cool way
- Do this two times using a different music artist
Save to your Google Drive folder
Lesson 5: ZOOM, BRUSH, ERASER, BRUSH SIZE
*WATCH THE VIDEO BELOW AND FOLLOW ALONG*
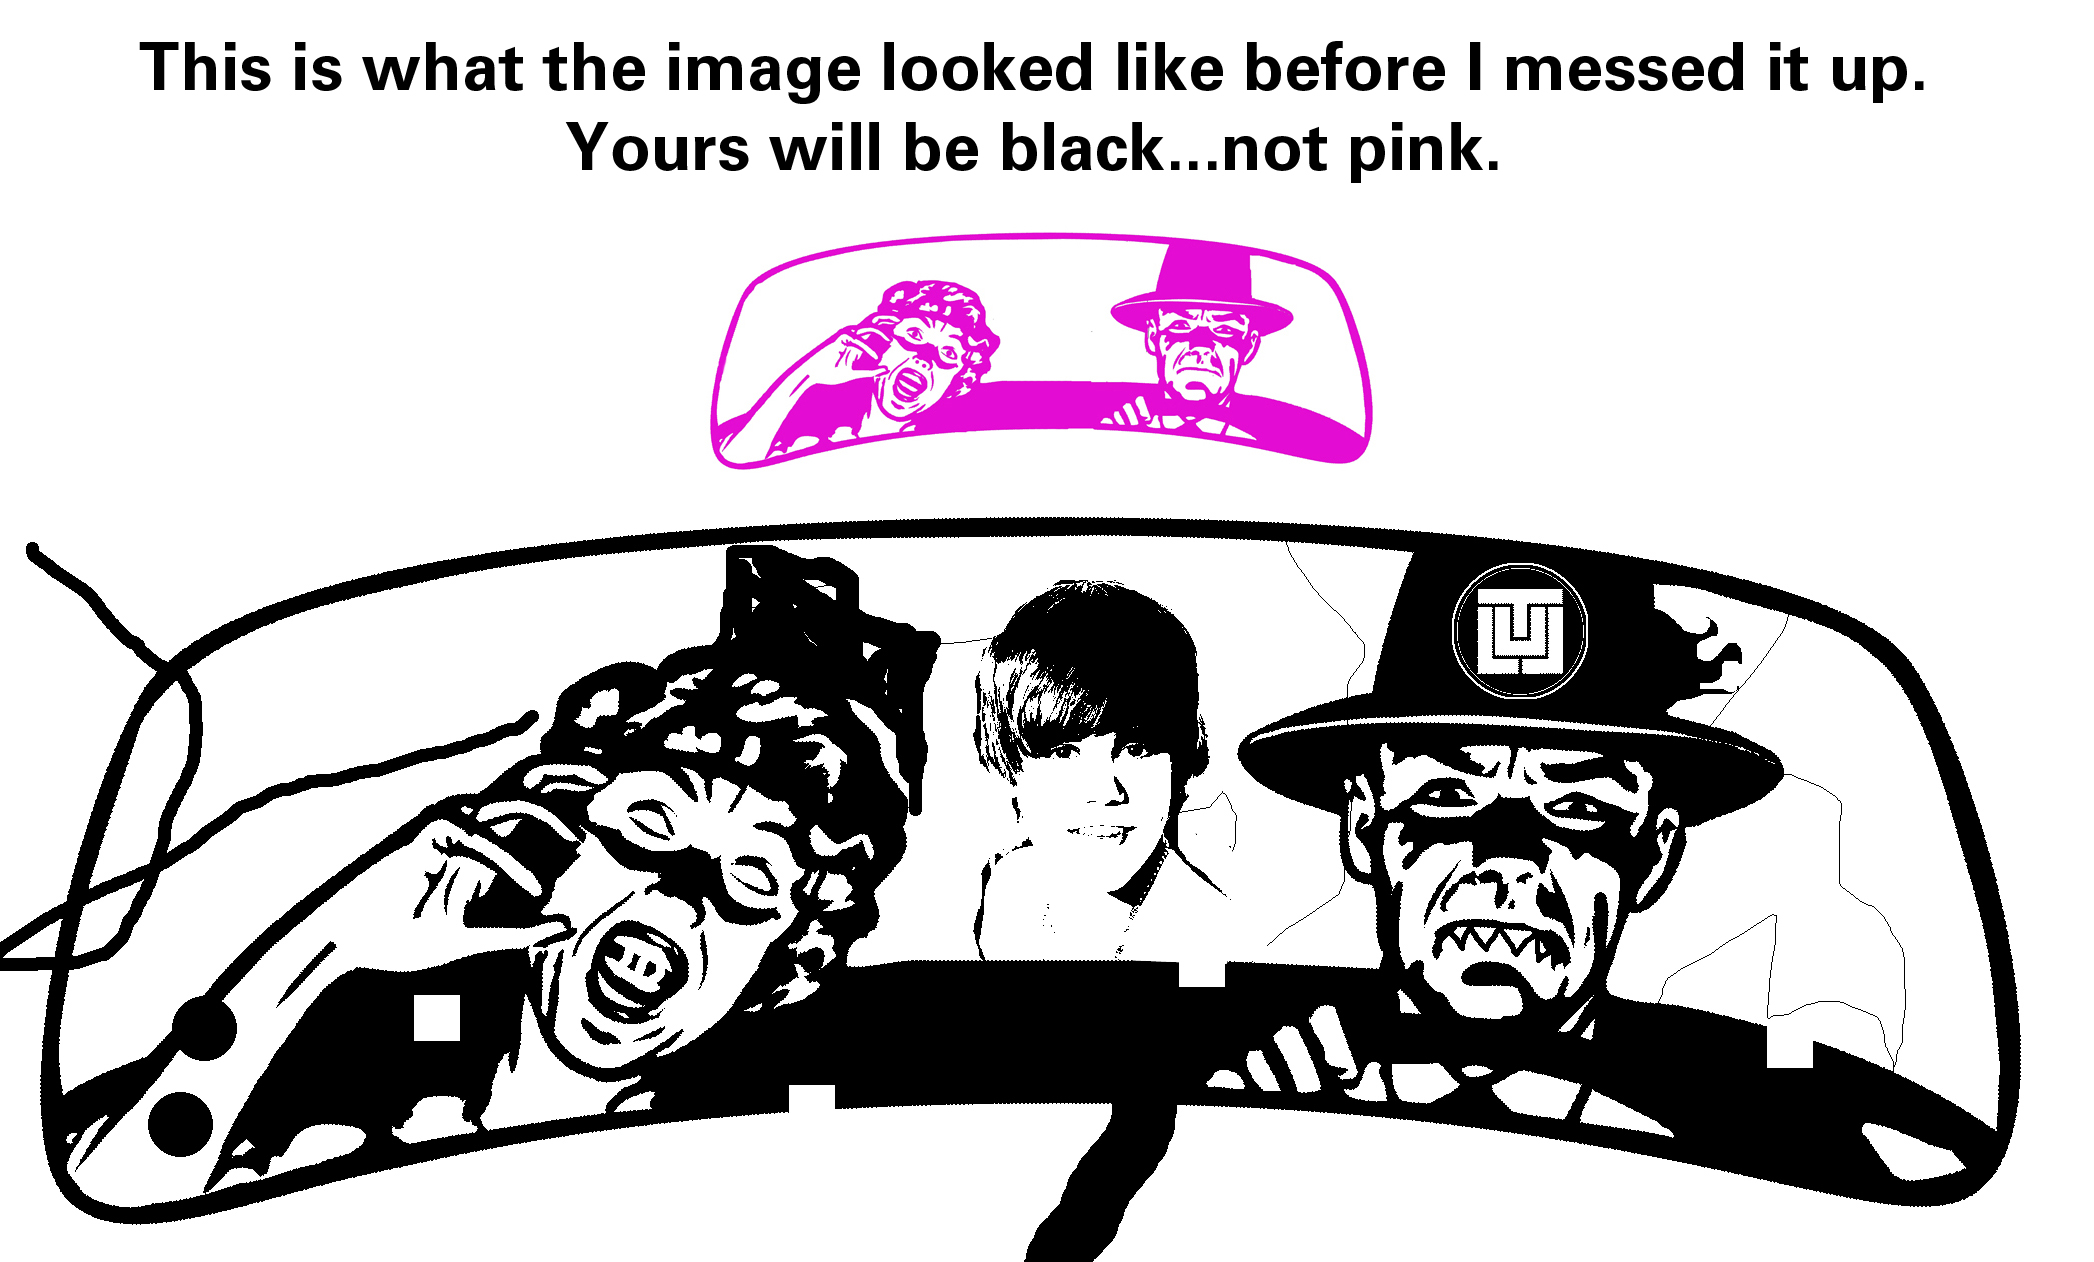
ASSIGNMENT: Restore the crazy driver image back to its original condition. Use only black & white. Use the eraser and paint brush. Show it to Mr. Boberg for credit.
TO OPEN -------------------------->
|
| ||
Save to your Google Drive folder
Lesson 6: SELECTION TOOLS
Watch the video below to help you complete the selection tool project
Don't want to watch the entire video? Confused about just one tool? Then watch the individual videos below.
Quick Selection Tool |
Magic Wand Tool |
Rectangular Marquee Tool |
Elliptical Marquee Tool |
Lasso Tool
|
Magnetic Lasso Tool |
Polygonal Lasso Tool
|
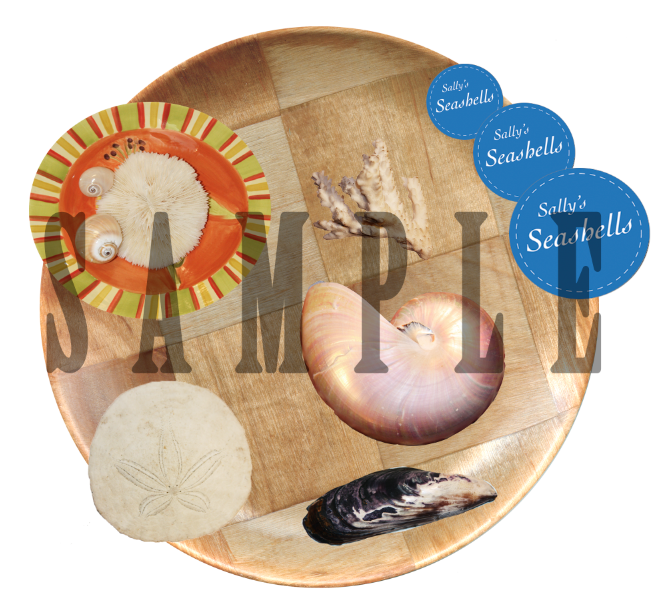
1. Download the project
2. Double click to open the project
2. Double click to open the project
| Seashells.psd |
Assignment:
Download the Lesson 4 File above
Using all of the tools listed above, recreate the image below (without the SAMPLE part obviously)
Download the Lesson 4 File above
Using all of the tools listed above, recreate the image below (without the SAMPLE part obviously)
Save to your Google Drive folder
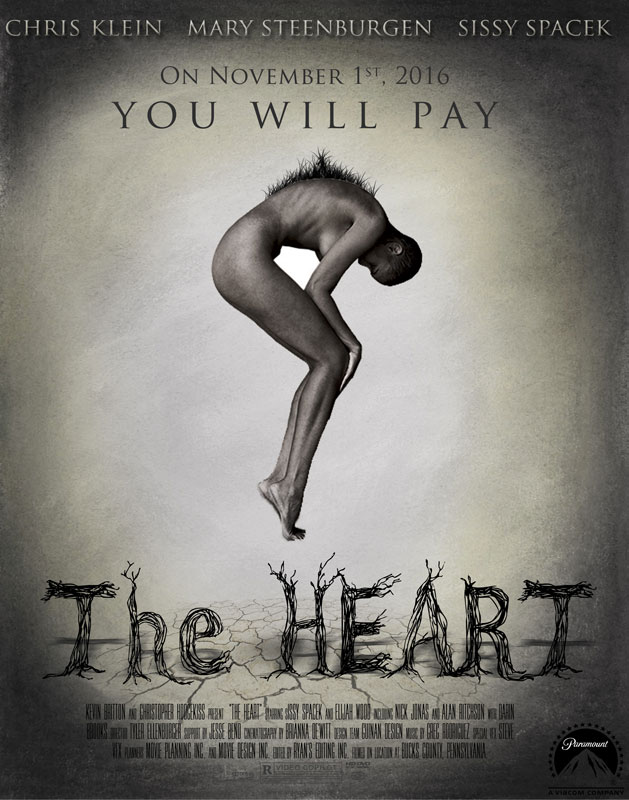
LESSON 7: TEXT
PROJECT 2: MOVIE POSTER
***ASK ME ABOUT THIS BEFORE STARTING ON IT!!!
OVERVIEW
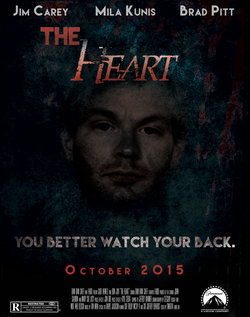
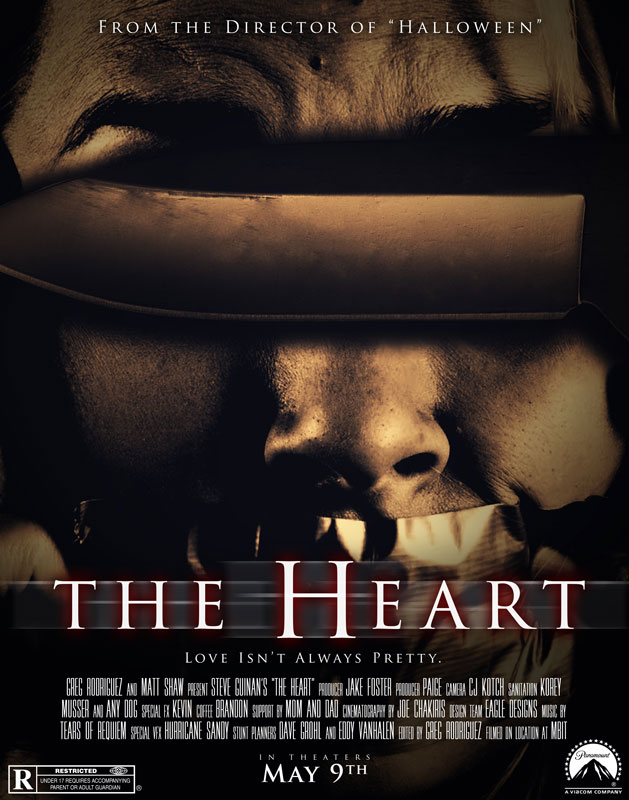
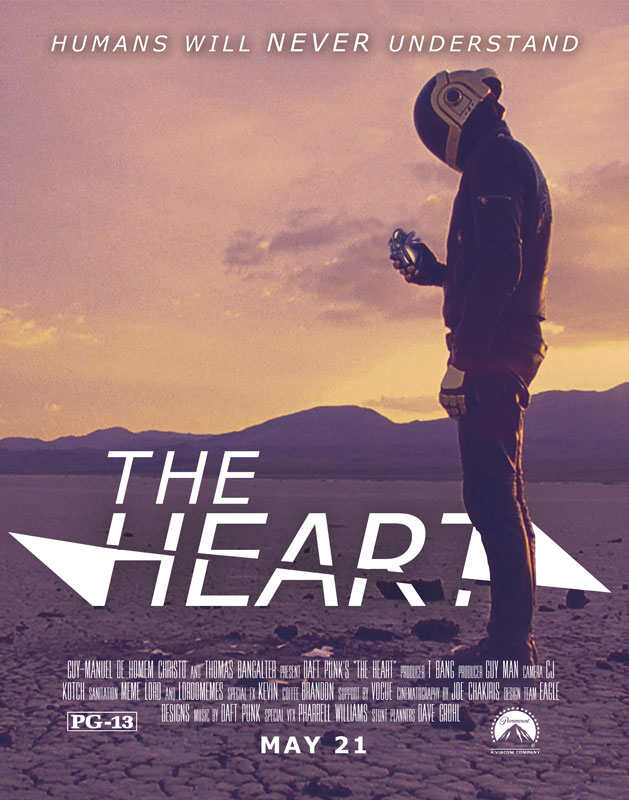
You are a graphic designer working for one of the large movie studios in Los Angeles. The studio is planning to release a film called “The Heart” this summer targeted to a variety of audiences. The studio needs ideas for this film, as well as designs for the posters used to advertise them.
The theme of this movie is open to your own interpretation. Anything goes (ie: horror, romantic, comedy, adventure, sci-fi, etc), the goal is to convey an idea of what the movie is about and to invoke interest in the viewer. You may use whatever style as well, painting, illustration, photography, photo manipulation, etc, or combinations of all. Our project is to design an original movie poster for the movie “The Heart.”
OBJECTIVE
Students will develop their compositional/layout skills by applying visual hierarchy principles to both imagery and typography components.
INSTRUCTIONS
1. Get inspired and research movie posters on the Internet. Look at the different components movie posters provide.
2. Start brainstorming for your Poster. Determine the movie genre, actors/actresses, movie rating, credits, tagline, images/graphics, etc.
3. Develop a proposal on a sheet of paper that contains:
5. Create a new file. Width =11. Height =14. 300ppi and in CMYK color mode.
6. Create and Design. Use the requirements below to make sure you include all of the necessary components:
8. Flatten the file and save it as a .JPG for submission.
You are a graphic designer working for one of the large movie studios in Los Angeles. The studio is planning to release a film called “The Heart” this summer targeted to a variety of audiences. The studio needs ideas for this film, as well as designs for the posters used to advertise them.
The theme of this movie is open to your own interpretation. Anything goes (ie: horror, romantic, comedy, adventure, sci-fi, etc), the goal is to convey an idea of what the movie is about and to invoke interest in the viewer. You may use whatever style as well, painting, illustration, photography, photo manipulation, etc, or combinations of all. Our project is to design an original movie poster for the movie “The Heart.”
OBJECTIVE
Students will develop their compositional/layout skills by applying visual hierarchy principles to both imagery and typography components.
INSTRUCTIONS
1. Get inspired and research movie posters on the Internet. Look at the different components movie posters provide.
2. Start brainstorming for your Poster. Determine the movie genre, actors/actresses, movie rating, credits, tagline, images/graphics, etc.
3. Develop a proposal on a sheet of paper that contains:
- Plot Summary: Plan out the basic parts of your film before starting your design. One paragraph including Genre, Title, Tag Line, Plot, Rating, Opening Date, and Characters. List the credits for your film.
- Sketches: Draw 3 sketches to brainstorm ideas and layouts.
- Inspiration: Include three movie posters that you like that are in your movie poster genre.
5. Create a new file. Width =11. Height =14. 300ppi and in CMYK color mode.
6. Create and Design. Use the requirements below to make sure you include all of the necessary components:
- imagery you develop in Photoshop must help support the idea behind the movie title
- tag line –(provides more information on the movie besides the title alone)
- opening movie date
- Actors & Actresses (at least 2)
- Credit / Billing block
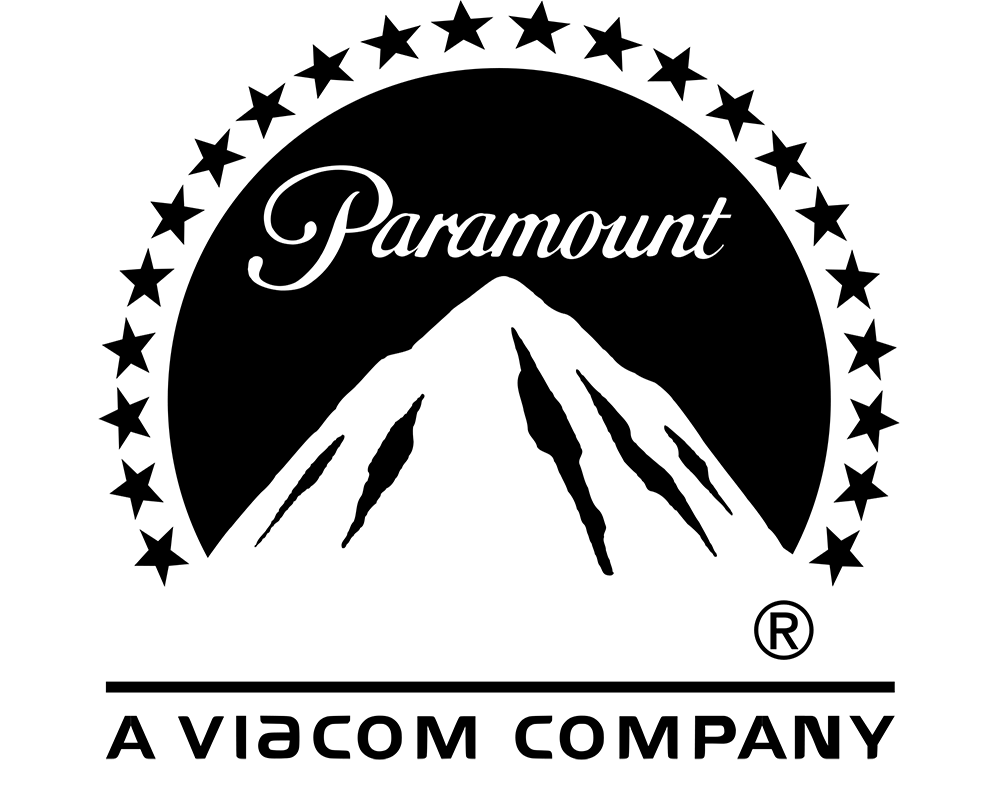
- Studio Logo (Paramount Logo provided)
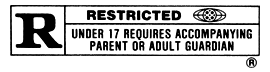
- MPAA rating (G, PG, PG-13, R – provided)
8. Flatten the file and save it as a .JPG for submission.
|
|
|
|
| ||||||||||
EXAMPLES
|
|
|
|
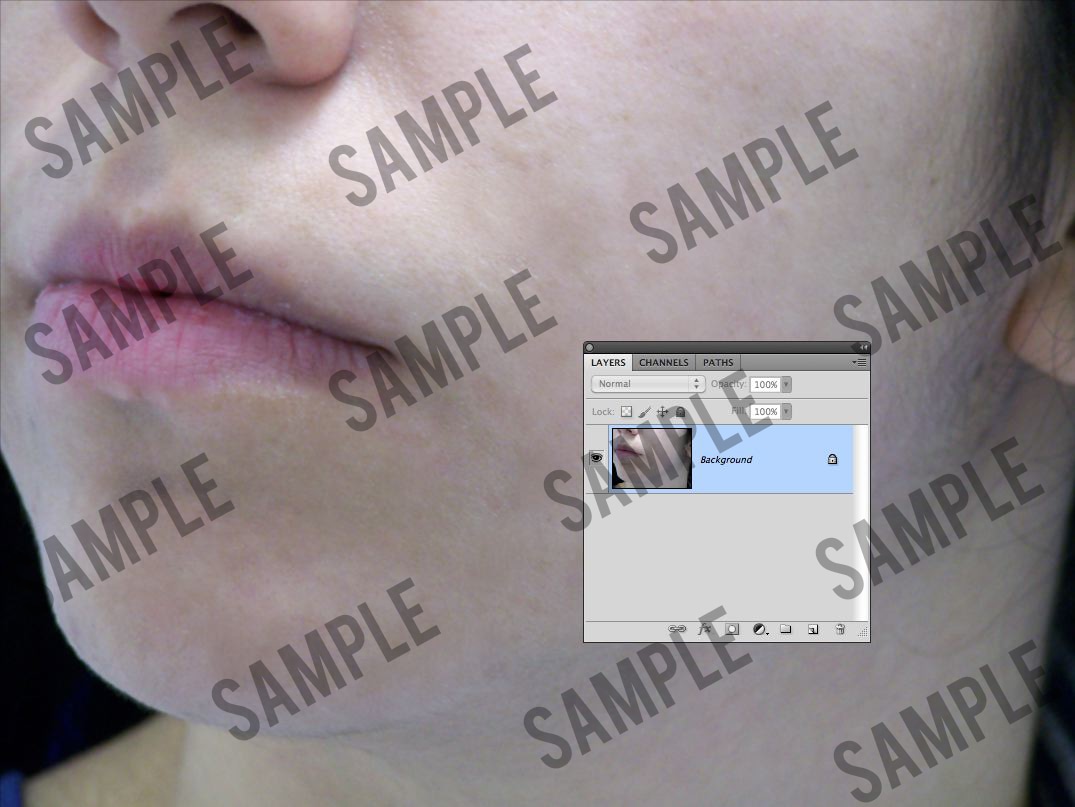
Lesson 8: CLONE STAMP TOOL
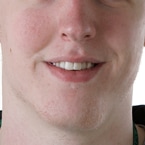
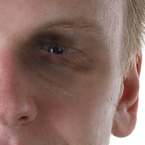
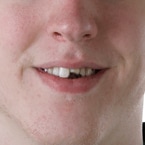
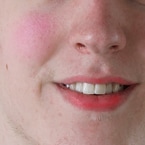
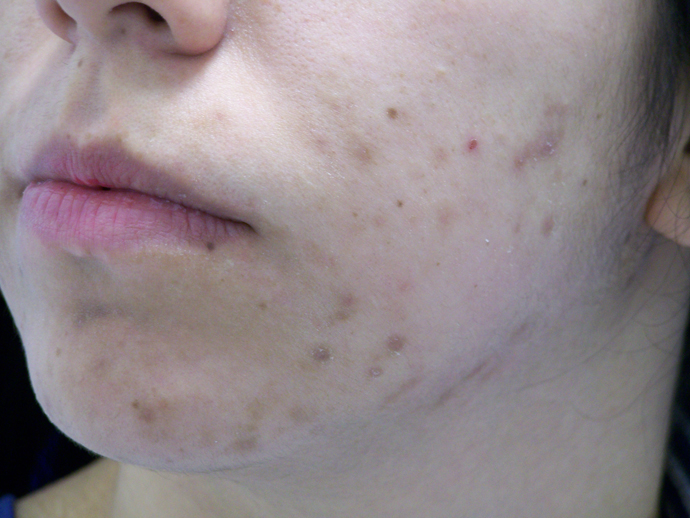
ASSIGNMENT: Fix the "bad acne" photo. It should look similar to the video below
Save to Google Drive
Save to Google Drive
|
<-----------CLICK AND DOWNLOAD THIS PICTURE | ||
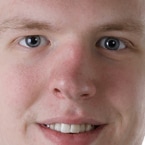
PROJECT 3: MUTANT ME
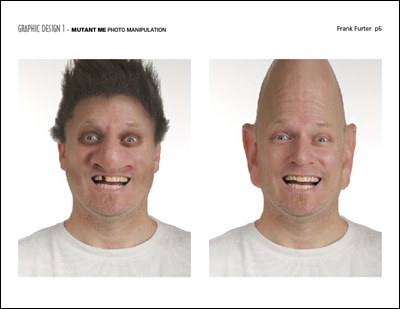
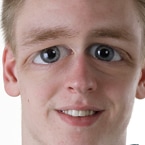
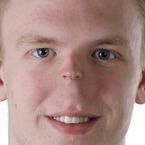
The overall concept is to use your ninja-like Photoshop skills to mess with your own head. Your goal is to generally keep it within the realm of believability. You want to fool the eye. You want the viewer to wonder how you did it because your Photoshop skills are so good that they are nearly invisible.
Use a wide variety of skills show below. Combine skills and techniques.
DIRECTIONS:
1. Find and download a head shot. I provided some links to help you:
Celebrities US Presidents Rappers NBA
2. FOR EACH PICTURE, SELECT ONE OPTION FROM EACH TECHNIQUE (IN RED)
EXAMPLE:
(1)REMOVE EYE
(2)BIG NOSE
(3)BRUISING
(4)LIPSTICK
(5)COLOR HAIR.
3. Submit your 2 Best Mutants.
4. "A" projects demonstrate "A" level content, skill, effort, initiative, and craftsmanship.
Menu of Techniques
1. Removal & Addition Techniques (SELECT ONE FOR EACH MUTANT)
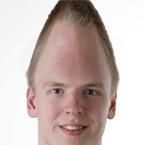
Remove Major Facial Feature
How to cover up things like eyes, nose, mouth, chin
|
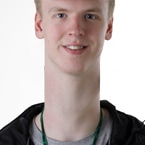
Remove Neck
How to drop the head down
|
2. Surgery Techniques (SELECT ONE FOR EACH MUTANT)
Big Nose
How to create a big nose
|
Big Rotated Eyes
Self explanatory
|
Conehead
Self explanatory
|
Mini Nose
How to shrink nose and fill in the empty space it leaves
|
Giraffe Neck
Self explanatory
|
3. Prize Fighter Techniques (SELECT ONE FOR EACH MUTANT)
Broken Nose
How to use a filter to twirl the nose
|
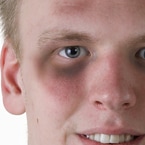
Bruising
How to painlessly give yourself a shiner
|
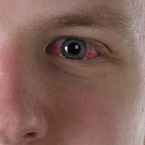
Blood Shot Eyes
Self explanatory
|
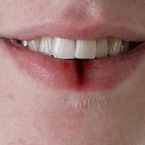
Split Lip
Self explanatory
|
Swollen Cheek and Chin
How to use filters to puff out a facial element
|
Bite Out of Flesh
Mmmmm....flesh!

|
Swollen Eyelids
How to use puff up your existing eyelids
|
Knocked Out Tooth
Self explanatory
|
4. Make Up Artist Techniques (SELECT ONE FOR EACH MUTANT)
Lipstick
|
Eyebrows, Eyeliner & Eyeshadow
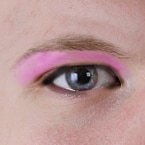
|
5. Hairstyle Techniques (SELECT ONE FOR EACH MUTANT)
Add and Remove Hair
How to use the clone stamp to grow more hair as well as remove hair
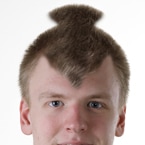
|
Color Hair
Self explanatory
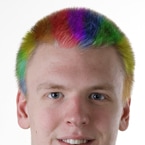
|
Borrow Someone Else's Hair
Self explanatory

|
Facial Hair
elf explanatory - but watch previous video first
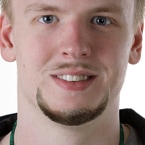
|
Go Bald
Turn yourself into your grandpa!
|
World's Sweetest Mullet!
You know you want do this!

|
PROJECT 4: GUILLOTINE
This is called the Guillotine project because you will completely cut the heads off of 2 other people.
You will perform 2 bloodless head transplants.
One surgery will involve smooth skin-to-skin blend of your neck directly onto someone else's.
The other surgery will involve placing your head & neck into someone else's shirt & collar.
You'll use a "sandwich layering" technique for the second surgery.
The finished images will look freaky but believable because of your Photoshop skills and attention to detail
SKIN TO SKIN SURGERY
PREP:
DOWNLOAD MUG SHOTS
DOWNLOAD BODIES
STEP 1: TRANSFER HEAD ONTO BODY FILE
STEP 2: BACK UP LAYERS
STEP 3: ADJUST HEAD (CHANGE SIZE, ROTATE AND FLIP)
STEP 4: ADJUST SKIN COLOR
**RECOMMENDED: BACK UP YOUR CHANGES!!**
STEP 5: ADJUST BODY LEVELS
STEP 6: CUT OFF HEAD
**MINOR ADJUSTMENTS**
STEP 7: ADJUST BLURRINESS
STEP 8: REWORK COLOR
STEP 9: LIGHTEN OR DARKEN (DODGE & BURN)
STEP 10: ADD NOISE
SANDWHICH LAYERING SURGERY
PREP:
DOWNLOAD MUGSHOTS
DOWNLOAD BODY
STEP 1: CREATE A SANDWHICH LAYER
STEP 2: GET RID OF OTHER HEAD
STEP 3: MAKE FINE ADJUSTMENTS
STEP 4: MAKE ADJUSTMENTS TO SKIN TONE
PROJECT 5: COMPOSITE IMAGING
Composite Image: Combining different source images into one composition. This will make significant use your selection and layer skills.
DEFILING CLASSIC ARTWORK
EXAMPLES:
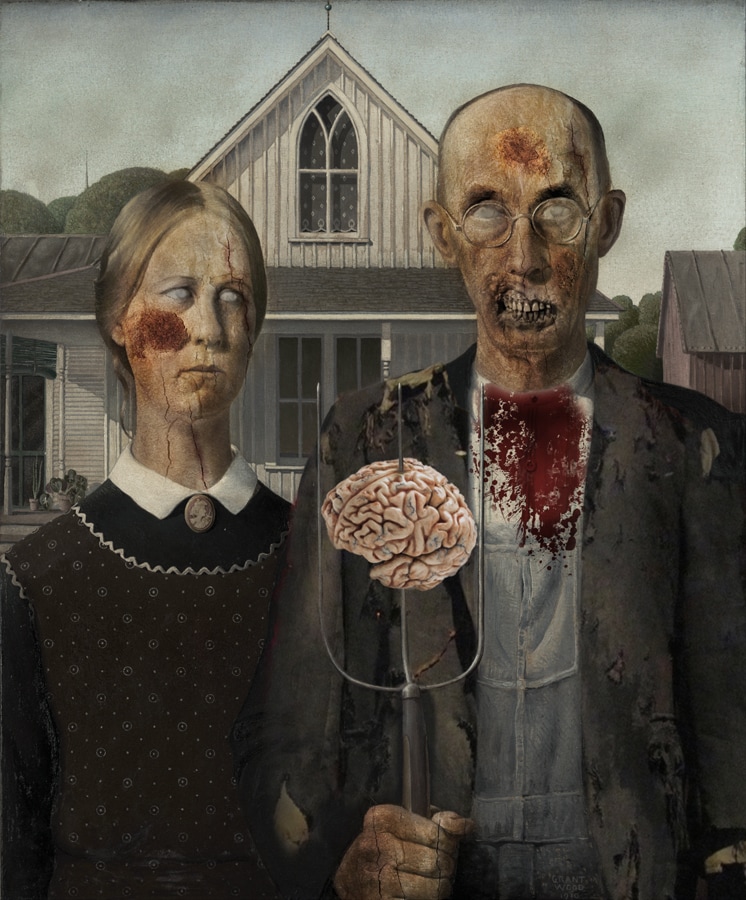
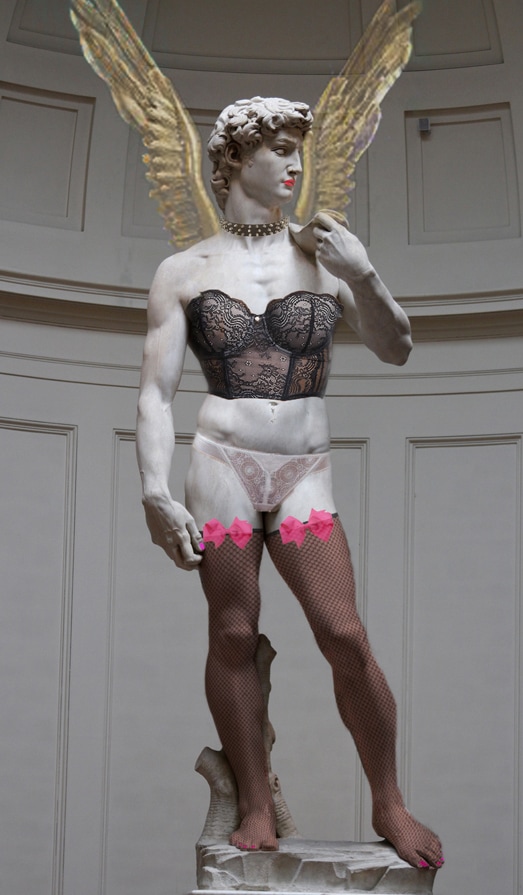
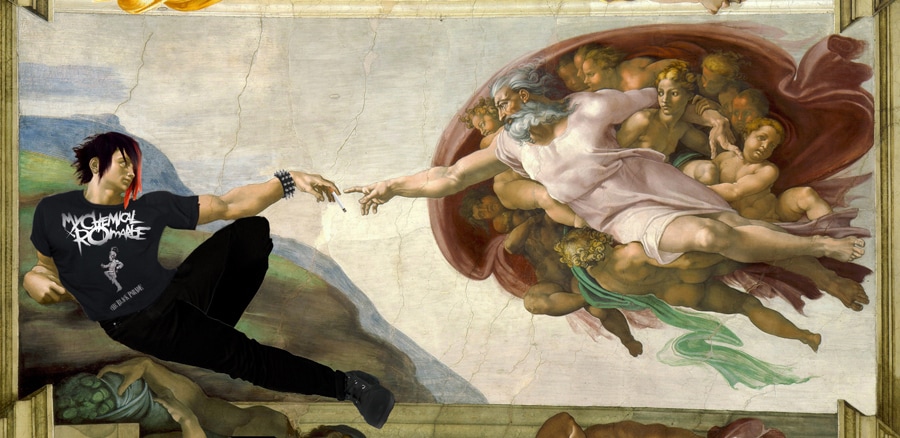
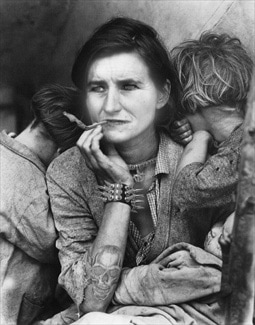
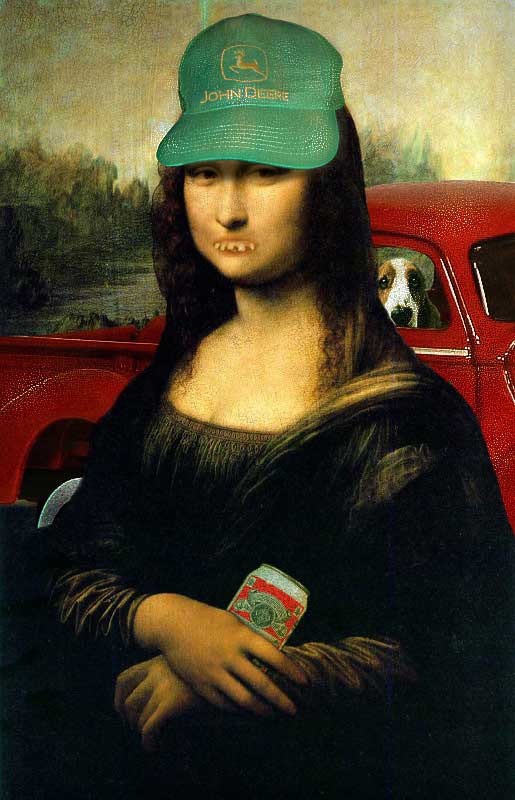
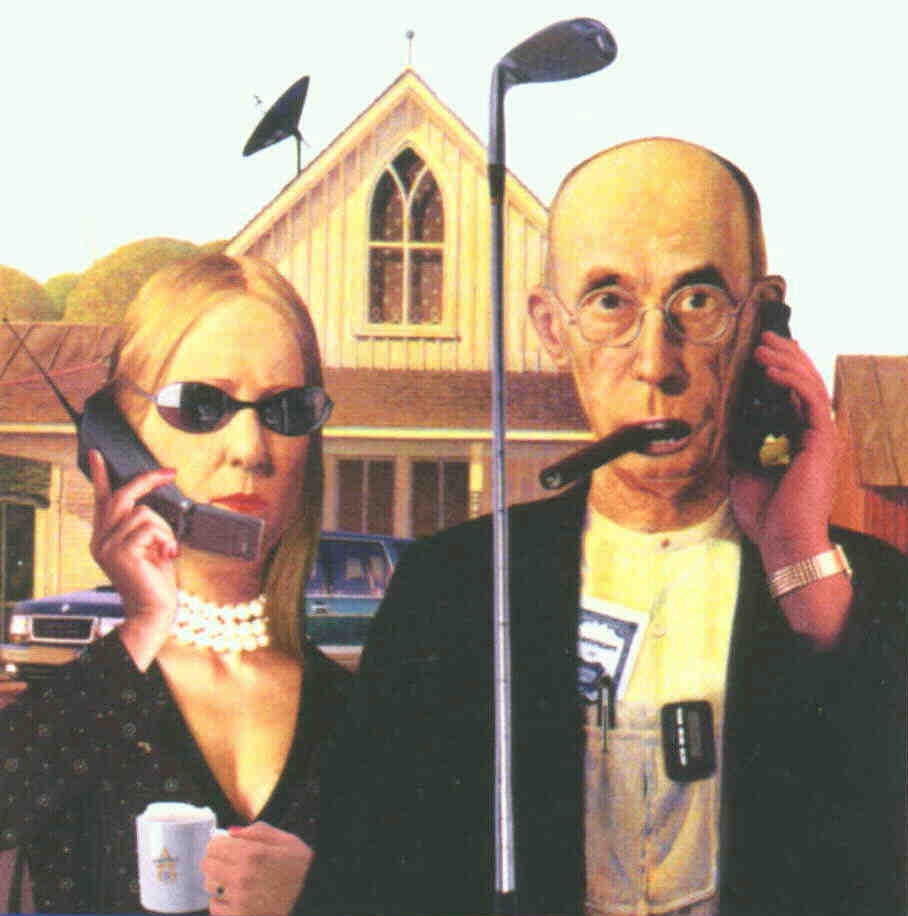
STEP 1: Click on ONE of these famous pieces of art and download the full sized image.

Creation of Adam

Le Demoiselles

La Grande Jatte

Mona Lisa
|

The Bath

Freedom From Want

Old Guitarist

The Scream
|

Christina's World

American Gothic

Oath of Horatii

The Thinker
|

David

Frida Kahlo Portrait

Migrant Mother

Whistler's Mother
|
STEP 2: Then choose a stereotype from this list: caveman, jock, nerd, yuppie, gold digger, billionaire, surfer, celebrity, hobo, diva, goth, trucker, redneck, emo, college professor, metal head, gamer, hippie, lumberjack, mad scientist, zombie.
STEP 3: Use Google to search for imagery to turn a masterpiece into a stereotype. You'll use the Photoshop skills that you've learned to create a composite image.
STEP 4: Save a copy of your file as a TIFF (no layers). Place the TIFF, enter your name & period, and SAVE TO YOUR GOOGLE FOLDER
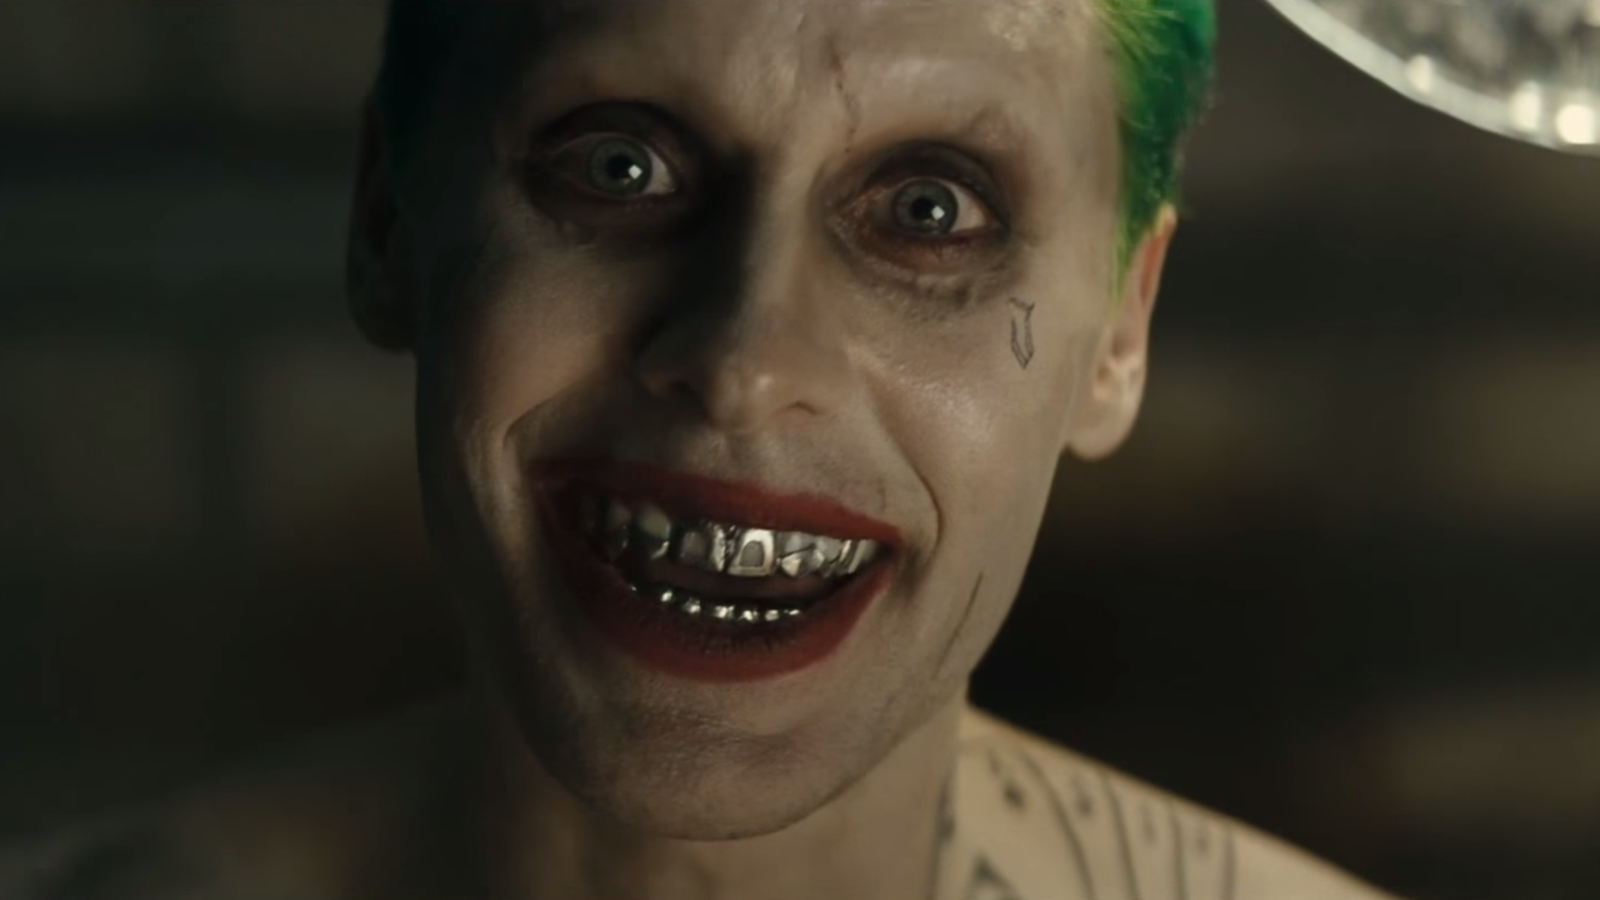
Extra Credit: TURN SOMEONE INTO THE JOKER
STEP 1: DOWNLOAD A PHOTO OF A HIGH QUALITY PHOTO OF YOURSELF OR FROM THE INTERNET
STEP 2: BRING PICTURE INTO PHOTOSHOP.
STEP 3: CLICK ON THE PICTURES BELOW TO DOWNLOAD:
STEP 2: BRING PICTURE INTO PHOTOSHOP.
STEP 3: CLICK ON THE PICTURES BELOW TO DOWNLOAD:
|
|
STEP 4: WATCH THE VIDEO BELOW AND FOLLOW ALONG
